Decided to clean out the gearbox internals prior to fitting the engine for the last time before it's first run. The c..p that came out of it defied belief. It was a mixture of gravel, rust and slime. No matter how many times we flushed it (eight times) more magnetic particles came out. At this point it became obvious that a total strip down was necessary.
Being temporarily out of funds for a professional rebuild I decided to do it myself this time. I have never stripped a car gearbox before so I ventured on to ebay to look for a spare to practice on and possibly get some spare parts. A auction came up for a spares or repair box that looked very similar to mine. It was described as an A7 or possibly A10 for spares or repair and the price was right.
The box arrived, it had quite a lot of corrosion around the clutch release bearing but the internals looked sound. I had a hell of a job getting at the first motion shaft bearing but a plasma cutter and a drifting screwdriver saw the release bearing off without much damage to the first motion shaft.
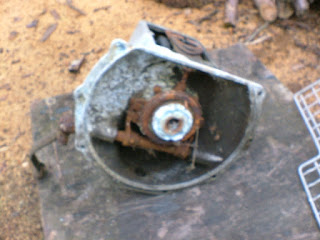 |
| Release bearing corrosion extensive |
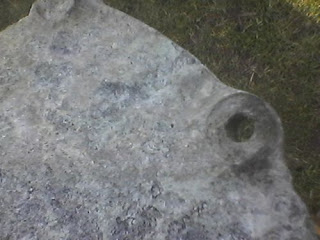 |
| Bell housing |
 |
| Release bearing |
After thoroughly flushing the box internally, further work got the gears out thanks to a good description in Doug Woodrow's book on the Austin Seven. A good heat gun is necessary to remove some of the parts especially the layshaft end cap.
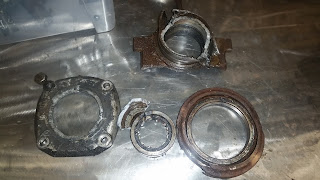 |
| Not much left of the clutch release bearing now |
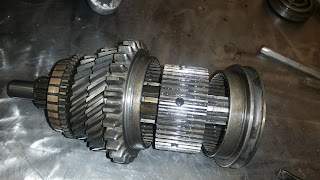 |
| Internal gears and syncro clutches still in good condition |
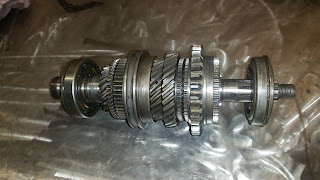 |
| Gears train after strip down and clean |
The box is an A10 type with odd ratios of 5.15, 3.10, 2.2 and 1.0 compared to my box of 4.36, 2.63.1.66, 1.0 the only explanation I can think of is it is an A10 van gearbox.
My gearbox rebuild 22/04/16
The A7 strip down was very similar to the A10 gearbox without the drama of having to cut out the first motion shaft bearing. After cleaning all the parts with a ultrasonic cleaner most of the parts looked pristine except the first motion shaft bearing, third motion shaft bearing, inter shaft bearing, one end of the lay shaft bearing and the detent ball and springs.
The essentials for doing such a rebuild job was:
* Set of bearings, detent balls, springs and gaskets (readily available from Austin Seven Workshop)
* Some steel shim sheets (ebay)
* Assembly tool for third motion shaft output bearing (35mm bar with 26mm x 65mm hole cut in end). I am sure other bits of pipes, 1/2" sockets etc can be used I just choose no to as it is a fiddly job.
* Selector rod detent assembly tool (drawing in Doug Woodrow's manual). I cannot imagine doing this rebuild without this tool, a major time saver.
* Synchroniser detent assembly tool, apparently a outer from a metal food tin of the right size will suffice. (I made one out of copper sheet and soldered it as I could).
* Access to some machining services for the casing indent for the 3rd motion shaft bearing clip.
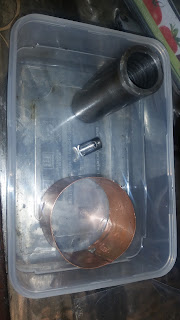 |
| Special tool collection |
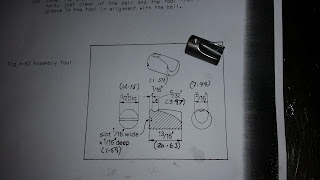 |
| Selector rod detent spring and ball assembly tool |
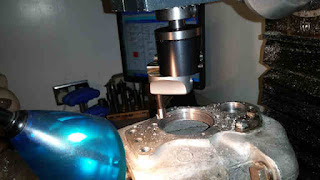 |
| Third motion shaft indent for cir-clip |
The first job is to extract the bearing on the engine side of the lay shaft, clean up the bearing surface and make up a steel shim and fit to the back of bearing to compensate for the wear and scoring suffered by years of use/abuse. Ideally you need to ream the bearing once you have reinserted it but I used a small flap wheel to remove any ridges carefully. The shim at the back of the bearing was 20 thou thickness in my case. The shim was cut out of 20 thou steel shim plate inner hole was 22mm the outer diameter was 36mm. I used Mag drills to cut this as they cut thin metal sheet better than twist drills.
The next job is to renew the synchroniser detent balls and springs. This requires the special tool which is basically a hollow cylinder that just fits over the synchroniser gear and 7mm hole to allow the ball to pass through. One you have done one ball and spring just move on to the next one.
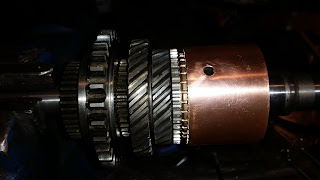 |
| synchroniser detent ball and springs tool |
The fist motion shaft bearing was pressed in easily with two 1/2" sockets of the appropriate size using a 6" Record vice as the press. The third motion shaft bearing has to be done with the front part of the partially assembled gear train in position in the casing. I found the special tool I made to be helpful as the whole lot was put in a hydraulic press. Once the bearings were assembled on to the shafts the bearings were inserted into the casing with the help of a heat gun applied onto the alloy casing surrounding the bearing seat.
One further note about the bearings: The spring cir-clips supplied with my bearings were too large to fit the detent in the casing, the clips were recovered from the old bearings,
so don't throw them out. On the third motion shaft I had to increase the detent area in the casing by 50 thou to allow for the cir-clip despite using the smaller original clip. The groove in the bearing was 25 thou less.
Once the bearings and gears were assembled the lay shaft was inserted through it's gear assembly. If the gears bind for any reason then a thicker or thinner gasket can be used on the end plate (or none at all). In my case I increased the gasket thickness.
The next job was the selector rods. These all have to be pre-fitted before you attempt to install the detent balls and springs. This definitely requires the special tool and a lot of patience. I only dropped one ball inside the gearbox that was promptly retrieved.
The rest of the build was done as per the manual with no further difficulties encountered.
The final task is to adjust the selector rods detent position relative to the casing. A screwdriver slot is provided in each rod for this purpose. Each gear is selected in turn to ensure there is no drag in the box as this will not enhance you gear changes.
.
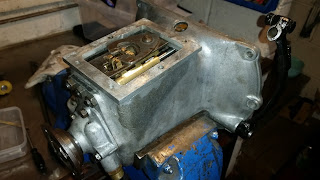 |
| The completely refurbished box |
I have to give full credit to Jim P for giving up his time to help with the build particularly the gearbox.
Update 4th Aug 21
This box remains as a spare part subsequently replaced with a "dog" racing box.
Here is an
Index page for the build


